Published 18. September 2023
Updated October 2025
Introduction
Welcome back to the KeepTool blog!
In this article, we’ll demonstrate how KeepTool 16 makes it easy to work with Oracle REST Data Services (ORDS) — a powerful framework that exposes your Oracle database as RESTful web services.
With ORDS, you can access database objects using standard HTTP(S) requests (GET, POST, PUT, DELETE) and return results as JSON. This enables lightweight integration between Oracle databases and modern applications written in JavaScript, Python, or any other language that can consume REST APIs.
ORDS is the foundation of many Oracle technologies, including:
-
Oracle APEX, where it provides REST access for applications and REST-enabled SQL queries
-
Custom APIs, allowing developers to expose data and logic from their own schemas
By combining KeepTool Hora with ORDS, you can design, test, and manage REST services directly from a graphical interface — no manual PL/SQL coding required.
Understanding the ORDS Architecture and URL Structure
Every ORDS endpoint corresponds to a specific resource in your database and follows a predictable URL structure:
Let’s break down the components:
-
hostname:port — The host and port where ORDS runs (e.g. localhost:8080).
-
ords — The web application context path.
-
<pldb> — The pluggable database (PDB) name.
-
<schema> — The database schema being exposed.
-
module — A logical grouping of related templates and handlers (like an API module).
-
template — Defines the URI pattern for a resource (e.g. /employees/).
-
:id — A URI parameter that identifies a specific record.
Each template can have one or more handlers, which define what happens when a client performs a GET, POST, PUT, or DELETE request on that endpoint.
Installing and Configuring ORDS
Before we use KeepTool to manage ORDS objects, ORDS itself must be installed and configured on your Oracle instance.
-
Download ORDS from https://download.oracle.com/otn_software/java/ords/ords-latest.zip .
-
Inside the installation folder, locate the params directory — it contains ords_params.properties, which controls configuration values such as the database connection and context path.
-
ORDS can be deployed in several modes:
-
This tutorial uses the standalone mode, which runs directly from the command line.
-
During the first run, ORDS will ask for:
-
A database connection (usually your pluggable database or container database)
-
A privileged administrative user, often PDBADMIN
-
ORDS automatically creates two internal schemas:
These schemas are the foundation on which KeepTool builds its ORDS management interface.
Starting the ORDS Server (Standalone Mode on Windows)
After installation, make sure the ORDS\bin folder is included in your system PATH.
You can then start the server by running the following command:
ORDS will open a lightweight web server that listens for HTTP and HTTPS requests.
You can now access it in a browser or through KeepTool.
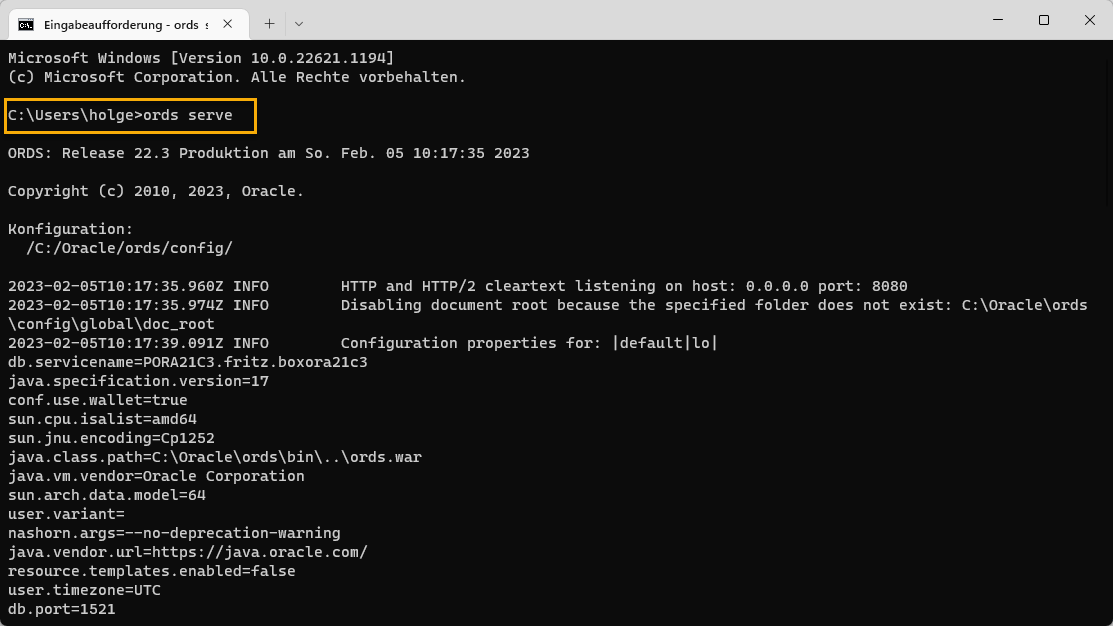
Starting the ORCALE ORDS Server
Enabling ORDS for a Schema in KeepTool
In KeepTool’s Hora, ORDS functionality can be found under the “Additional” menu.
The ORDS Schema grid displays which schemas are currently REST-enabled.
If you have ORDS administrator privileges, you can right-click in this grid and select:
👉 “Enable Schema”
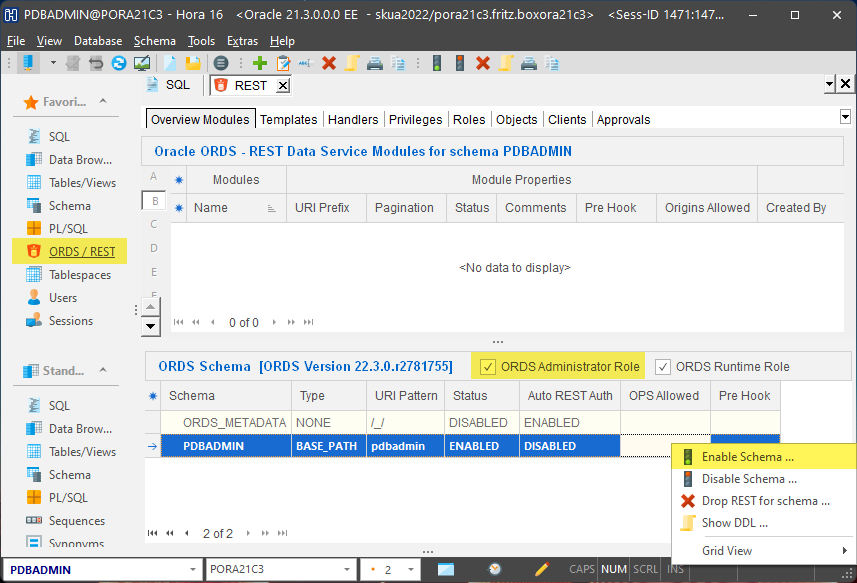
Menu items for an ORDS schema
A dialog appears that allows you to:
Once confirmed, Hora executes the necessary ORDS PL/SQL calls to enable REST for that schema.
If you are connected as a normal user, you’ll only see your own schema listed.
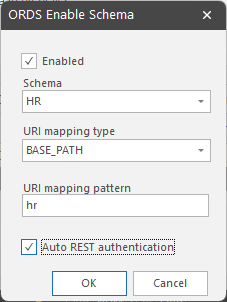
Enable ORDS schema dialog
Creating a REST Module
An ORDS module is a logical container for templates and handlers. Think of it as a small API project — for example, you might create a module named /hr_demo/.
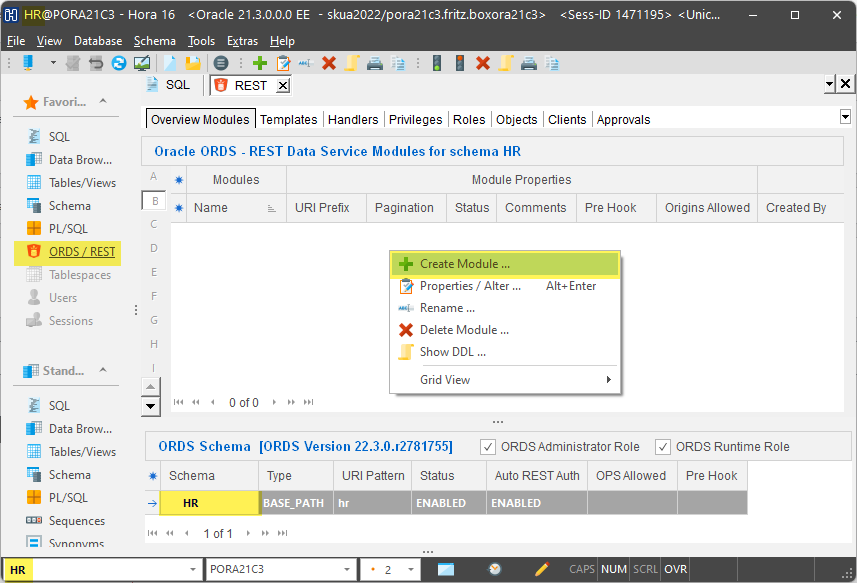
Menu items for ORDS modules
To create one in KeepTool:
-
Go to the Modules tab.
-
Right-click → “Create Module”.
-
Enter the module name and base URI.
-
Confirm your changes.
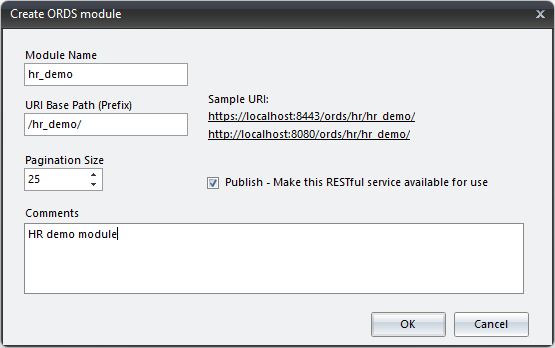
Create ORDS module dialog
The new module will appear in the list, along with its context path and schema.
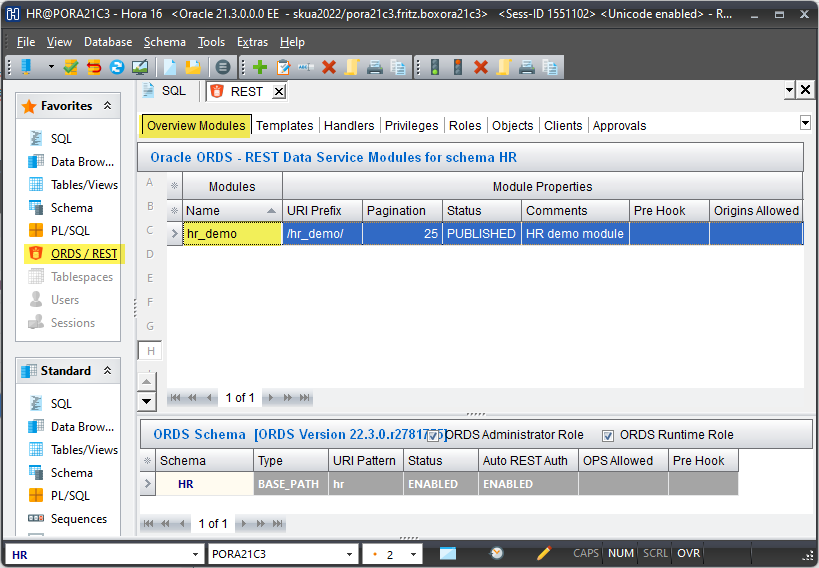
New ORDS module is now listed on the overview modules page
Creating a ORDS Template
A template defines a resource path within a module. For example, you might create a template /emp to represent employee data.
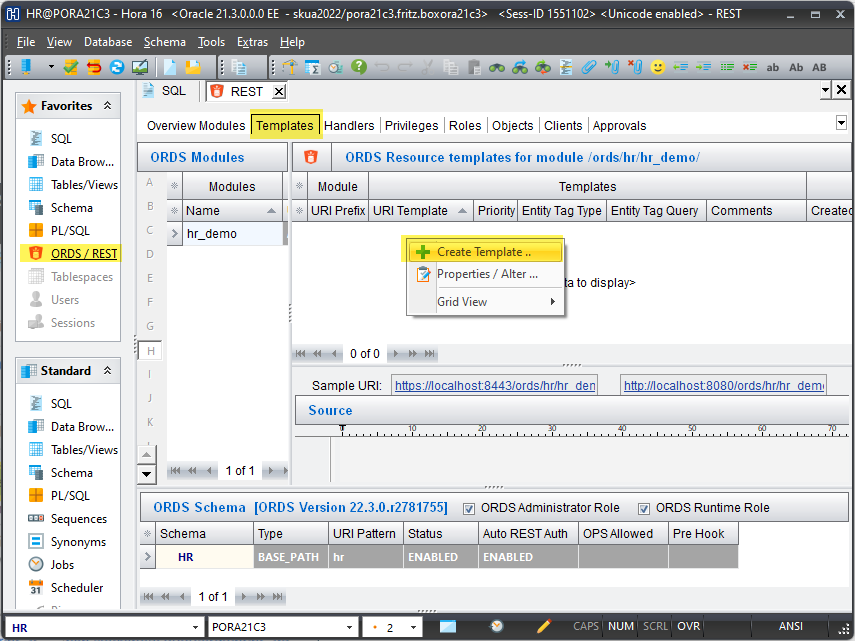
Menu items for ORDS templates
Steps:
-
Go to the Templates tab.
-
Right-click → “Create Template”.
-
Assign the new template to an existing module (e.g. hr_demo).
-
Enter a URI pattern such as emp.
-
Add an optional comment to describe its purpose.
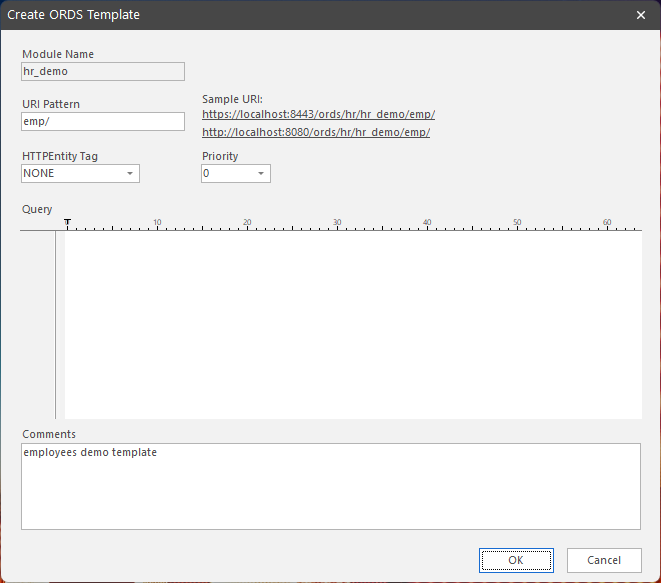
Create ORDS template dialog
The new template will be listed, and Hora automatically shows sample HTTP and HTTPS URIs you can use later for testing.

New ORDS template on the templates page and sample URIs for HTTP and HTTPS
Defining a Handler (the REST Logic)
Each template needs one or more handlers to define how incoming requests are processed.
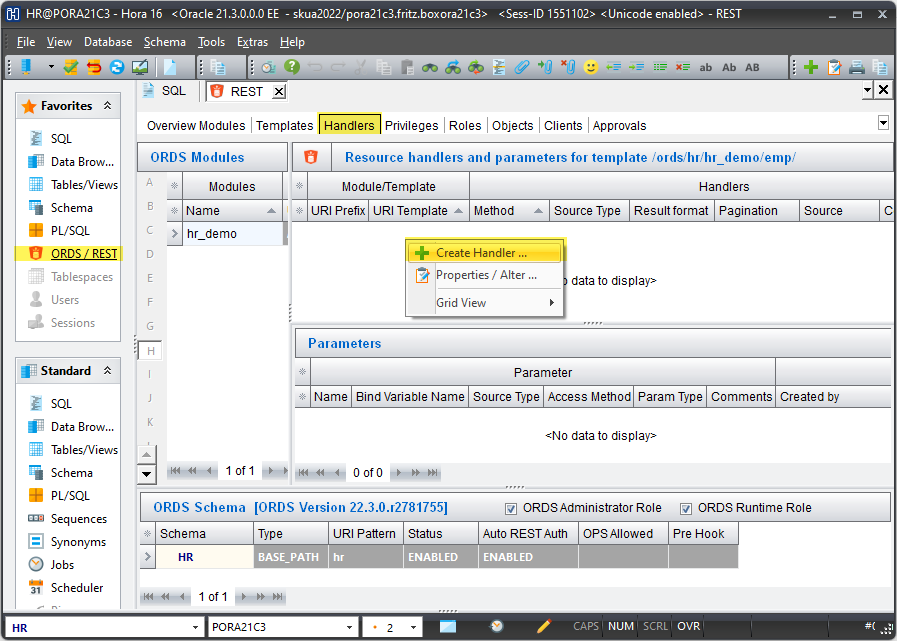
Menu items for ORDS handlers
To create one in Hora:
-
Open the Handlers tab.
-
Right-click → “Create Handler”.
-
Select the template (e.g. /emp).
-
Choose the HTTP method (GET, POST, PUT, or DELETE).
-
Choose the input/output format (typically JSON).
-
In the SQL editor, write your query or PL/SQL logic.
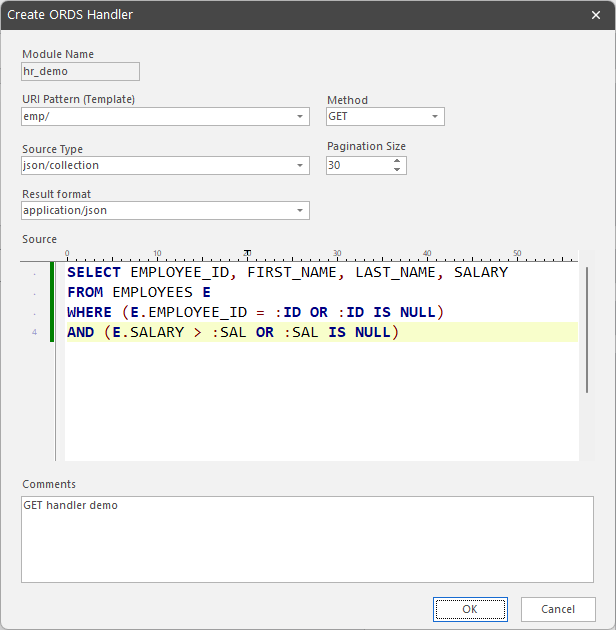
Create ORDS handler dialog
Then define parameters for :id and :sal via the parameters grid below the SQL editor:
-
Right-click → “Define Parameter”
-
Add names, data types, and default values if needed
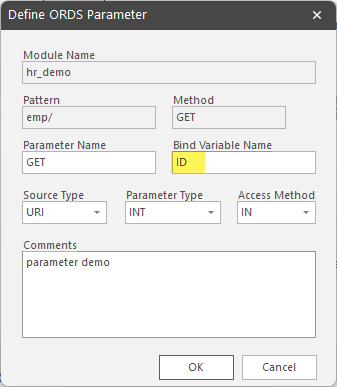
Define ORDS parameters and bind variables dialog
Hora automatically generates sample URIs for testing, for example:
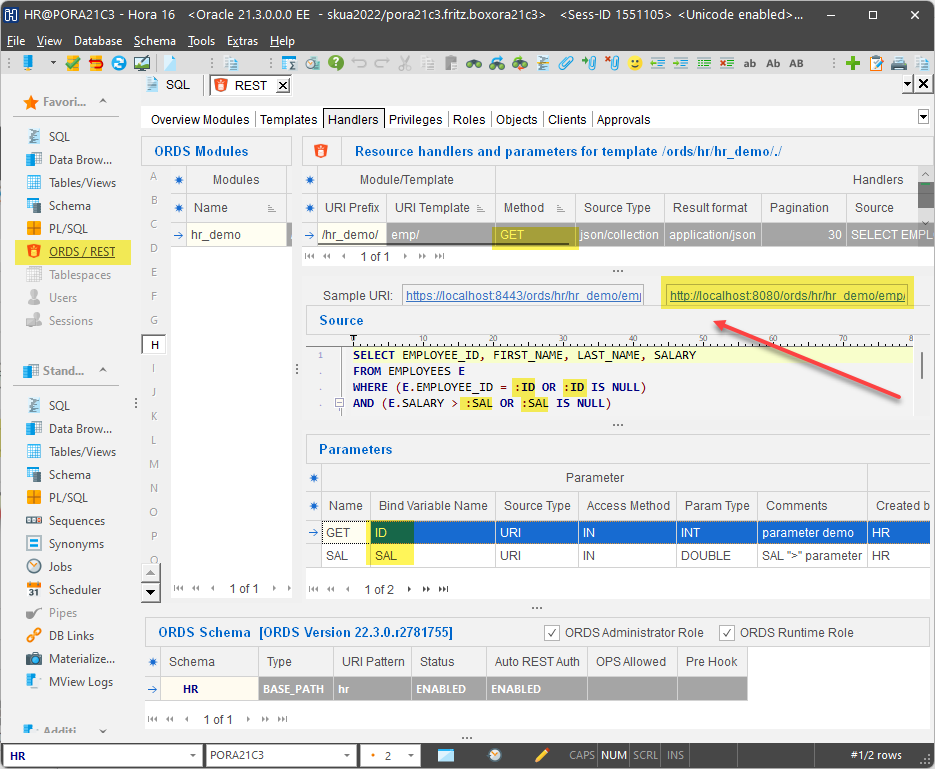
Sample URI for the GET method of the handler
Testing the REST service
Now it’s time to verify that your new service works.
With the ORDS server running:
-
Copy one of the generated URIs from Hora.
-
Paste it into your browser or a REST client (such as Postman).
-
The response should be JSON data from the EMPLOYEES table.
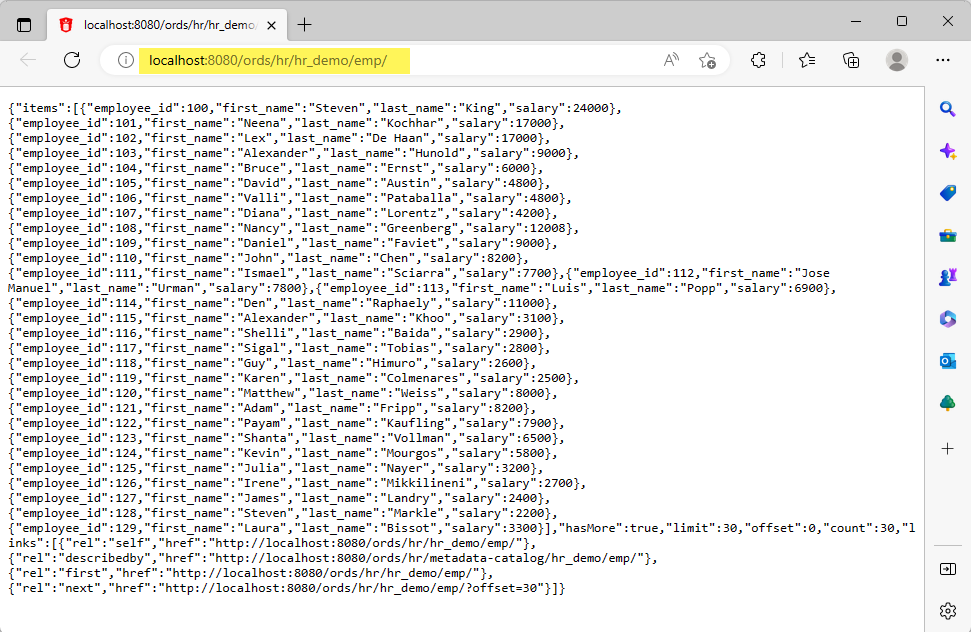
Calling the REST service from your browser and JSON result
You can easily pass URL parameters such as ?id=123 or ?sal=10000 to filter the data dynamically.
This allows your REST service to deliver only the relevant records, making it straightforward to integrate database queries into web or mobile applications.
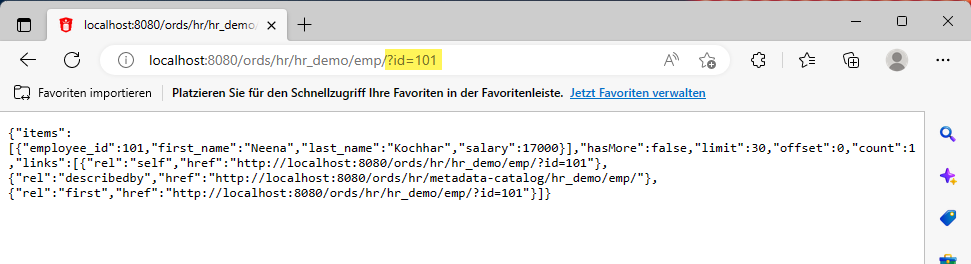
Passing parameters to the REST service
As you can see, the JSON response contains a single EMPLOYEE object along with several supporting HTTP reference fields.
Alternatively, you can filter results by salary by adding a sal parameter to the request.
For example, querying with ?sal=10000 returns all employees whose salary exceeds 10,000.
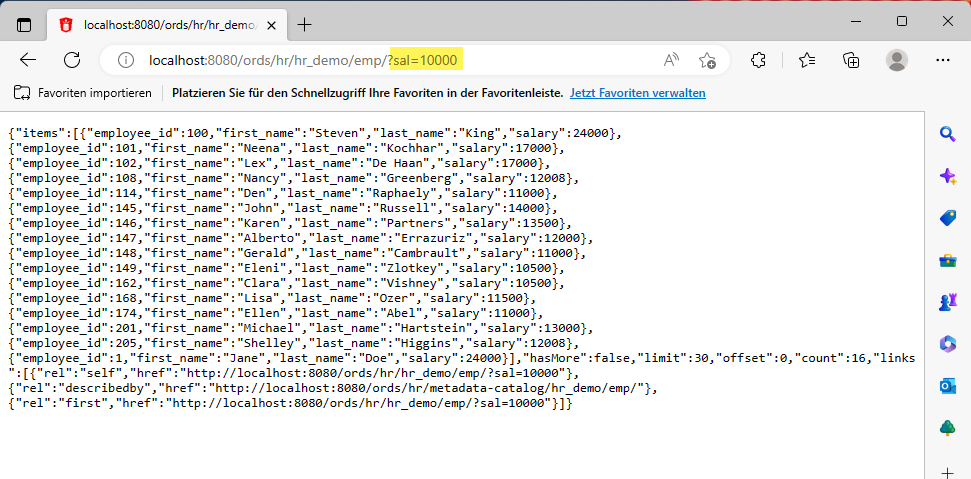
Parameterized test call and JSON result
Expanding Your ORDS Services
Once you’ve mastered the basics, you can extend your ORDS service by:
-
Adding POST, PUT, and DELETE handlers for data modification
-
Returning hierarchical data or JSON arrays
-
Using authorization schemes to control access
-
Integrating your endpoints into APEX or other web apps
ORDS is a full-featured web layer for Oracle — and KeepTool provides an intuitive GUI for exploring and managing it without writing complex PL/SQL packages manually.
Summary
With KeepTool 16 and Oracle REST Data Services, you can:
-
Enable ORDS on a schema
-
Create REST modules, templates, and handlers
-
Define SQL-based REST endpoints in minutes
-
Test and preview your REST APIs directly in Hora
This streamlined workflow allows developers, DBAs, and analysts to build modern, standards-compliant REST services from existing Oracle data — quickly and visually.
➡️ Try KeepTool for free
KeepTool's Oracle tools are designed specifically for developers, DBAs, and support teams.
Based on over 25 years of experience, we continuously optimize our software to make your database analysis and documentation faster, more efficient, and clearer.